
പഴയ പെയിന്റ് ബക്കറ്റ് ഇനി ചുമ്മാ കളയല്ലേ.!! ഒരൊറ്റ ബക്കറ്റ് മതി എത്ര പറിച്ചാലും തീരാത്തത്ര കയ്പക്ക കിട്ടും | Paval Krishi Using old Bucket
Paval Krishi Using old Bucket
Paval Krishi Using old Bucket : വീട്ടിൽ കൃഷി ചെയ്യുമ്പോൾ ചെടി നടുന്നതും അതിന് വളം തയ്യാറാക്കുന്നതും ഒരേസമയം ചെയ്യാൻ പലർക്കും ബുദ്ധിമുട്ടുള്ള കാര്യമാണ്. എന്നാൽ സമയം ലാഭിക്കുന്നതിനായി ഇതു രണ്ടും ഒരേ സമയം തന്നെ ചെയ്യാൻ സാധിക്കുമോ എന്നാണ് അധികവും കർഷകർ നോക്കുന്നത്. ഇന്ന് അങ്ങനെയുള്ളവർക്ക് ആയുള്ള ഏറ്റവും
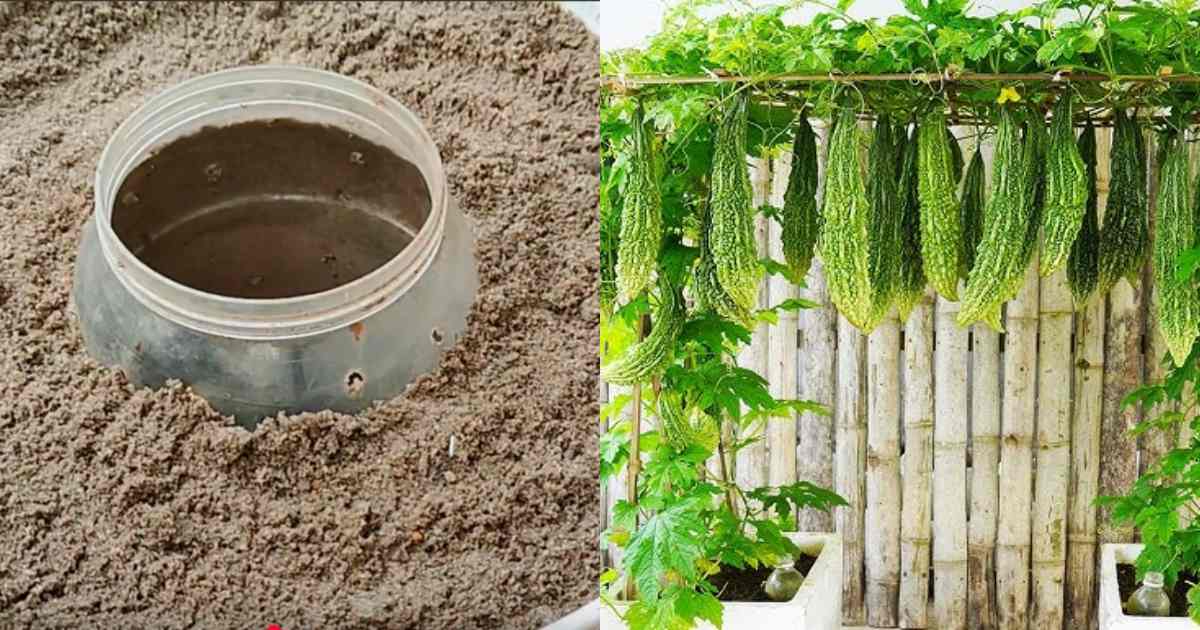
എളുപ്പ മാർഗത്തിൽ കൃഷിയും വളം നിർമ്മാണവും എങ്ങനെ ഒരേസമയം ചെയ്യാമെന്നാണ് ഇന്ന് നോക്കുന്നത്. അതിനായി ആദ്യം തന്നെ വേണ്ടത് വലിയ ഒരു പെയിൻറ് ബക്കറ്റ് ആണ്. വീട്ടിൽ പെയിൻറ് ബക്കറ്റ് ഇല്ലാത്ത വർക്ക് ആക്രി കടയിൽ നിന്നും മറ്റും ഇത് വാങ്ങാവുന്നതാണ്. പെയിൻറ് ബക്കറ്റിന്റെ അകവും പുറവും നന്നായി വൃത്തിയാക്കിയ ശേഷം അതിന് ചുവട്ടിൽ ദ്വാരം ഇട്ടുകൊടുക്കുകയാണ് ആദ്യം വേണ്ടത്. ചെടിക്ക് ഒഴിച്ചു കൊടുക്കുന്ന വെള്ളം അമിതമായി
കഴിഞ്ഞാൽ അത് പുറം തള്ളുന്നതിനാണ് ബക്കറ്റിന്റെ അടിയിൽ ഇത്തരത്തിൽ ദ്വാരം ഇട്ടുകൊടുക്കുന്നത്. അതിനുശേഷം ബക്കറ്റ് നിറക്കുകയാണ് അടുത്തതായി ചെയ്യുന്നത്. അതിനായി ഏറ്റവും താഴെ തട്ടിൽ കരിയില ഇട്ട് കൊടുക്കാം. അതിനു മുകളിലേക്ക് മണ്ണ് പിന്നീട് എല്ലുപൊടി, വേപ്പിൻ പിണ്ണാക്ക്, ചാണക പൊടി ഏതെങ്കിലും ഒന്ന് ഇട്ടു കൊടുക്കാവുന്നതാണ്. ഇതിനു മുകളിലായി ഒരു പാത്രത്തിൽ നിറയെ ഹോളുകൾ ഇട്ടശേഷം ഒരു ബോട്ടിൽ ഇതിലേക്ക് ഇറക്കി
വയ്ക്കാവുന്നതാണ്. ശേഷം ഇതിനു ചുറ്റും മുൻപ് ചെയ്തത് പോലെ തന്നെ കരിയില, ചാണകപ്പൊടി, മണ്ണ് എന്നിവ ചേർത്ത് നിറച്ച് എടുക്കാവുന്നതാണ്. അതിനുശേഷം നടാൻ ഉദ്ദേശിക്കുന്ന വിത്ത് ഇതിൽ നട്ടു കൊടുക്കാവുന്നതാണ്. ഇനി നമ്മൾ എടുത്തു വച്ചിരിക്കുന്ന ബക്കറ്റിലേക്ക് എങ്ങനെ അടുക്കള വേസ്റ്റ് നിറയ്ക്കാം. എങ്ങിനെയാണ് ഇതെല്ലം ചെയ്യേണ്ടത് എന്ന് വീഡിയോയിൽ വിശദമായി കാണിച്ചു തരുന്നുണ്ട്. വീഡിയോ മുഴുവനായും കണ്ടു നോക്കി ഇതുപോലെ നിങ്ങളും പഴയ പെയിന്റ് ബക്കറ്റിൽ പാവൽ കൃഷി ചെയ്തു നോക്കൂ. Video Credits : MY AIM Paval Krishi Using old Bucket
Paval Krishi (vegetable gardening) is a simple and eco-friendly way to grow fresh vegetables at home, even in small spaces. An old bucket can be easily turned into a mini-garden with a few steps:
- Choose the Bucket – Take an old plastic or metal bucket. Clean it well and make sure it is strong enough to hold soil.
- Make Drainage Holes – Using a nail or drill, make 4–5 small holes at the bottom of the bucket to drain excess water. This will prevent waterlogging and root rot.
- Prepare the Soil Mix – Fill the bucket with a mix of soil, cow dung/compost, and sand in the ratio 2:1:1. This will provide good nutrients and aeration for the plants.
- Select the Vegetable – Choose easy-to-grow vegetables like spinach, tomato, brinjal, chilli, ladies’ finger (okra), or even curry leaves.
- Planting – Sow seeds directly or plant small saplings in the soil. Water lightly after planting.
- Placement – Keep the bucket in a sunny spot (balcony, terrace, or courtyard) where the plant can get at least 4–6 hours of sunlight daily.
- Care – Water regularly but avoid excess. Add organic manure or kitchen compost once in 15–20 days for better growth.
- Harvesting – Within a few weeks to months, depending on the crop, you can start harvesting fresh homegrown vegetables right from your bucket garden.
🌱 This method is cost-effective, makes use of waste materials, and is ideal for terrace farming or balcony gardening.